DIY PVC playgym

OutlawedSpirit

New member
Apr 12, 2016
1,020
21
Northern Illinois, USA
Parrots
Bo - DYH ~ Gus - CAG ~ Twitch - Linnie ~ Apple - Pineapple GCC ~ Goliath - Quaker ~ Squish - Peach face Lovebird
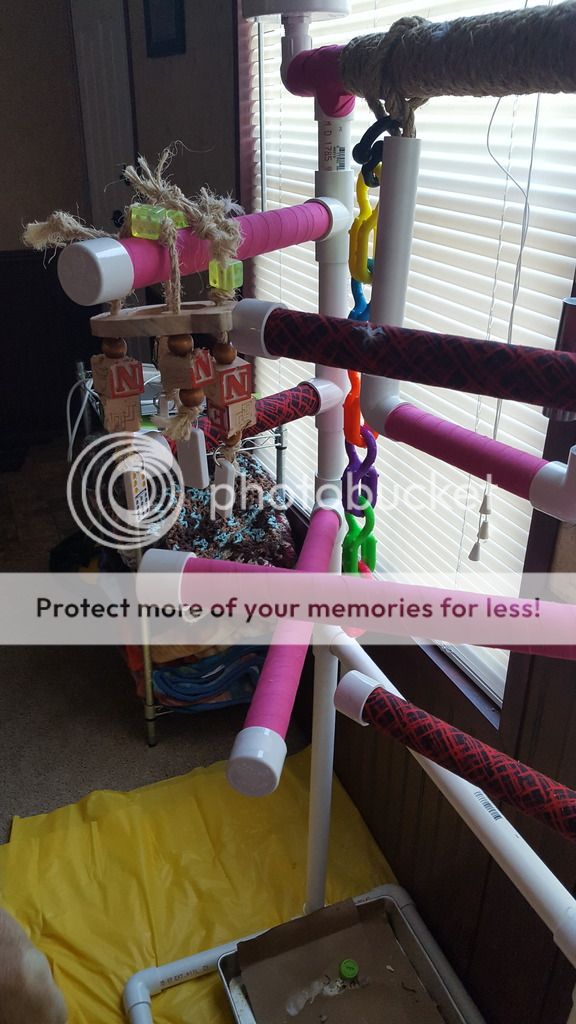
I decided to make the pretty chicken a playgym. Not too bad, if I say so myself, considering I spent all of like 30 bucks.


It even has a swing! I'm pretty proud of myself. I hammered everything together, as opposed to actually bonding it together, that way it can be completely dismantled. I figure that serves three purposes:

For one, it can be taken completely apart and thrown in the bathtub to clean.

Two, we travel a couple times a year, so it can be broken down into pieces, brought with us, and put up when we get there.

Three, it can be rebuilt if the chicken gets bored with it. I have extra PVC, so I could cut more if necessary. And really, it is less than 2 bucks for 5 feet, so I can always get more. The connector pieces are what is expensive, but even those are only a buck or two. I think the most expensive part was the sisal I got to wrap the top perch and make the swing out of.
 
  • Thread Starter
  • Thread starter
  • #3
Also, I just want to give a shout out to Chris and Parkerdoodles. The pretty chicken has always had an issue with staying on a playstand. I had a tabletop one that she was fine on, until I walked away. She was the same way with this one, at first, until the popcorn. I gave her a piece when I put her up there and then threw another one in her bowl. I just went to go pick her up since she actually stayed up there, but she wasn't done with her popcorn, and told me in no uncertain terms, that she would prefer to finish her popcorn before I am allowed to pick her up.
 
  • Thread Starter
  • Thread starter
  • #4
Nice job! How did you do the base?

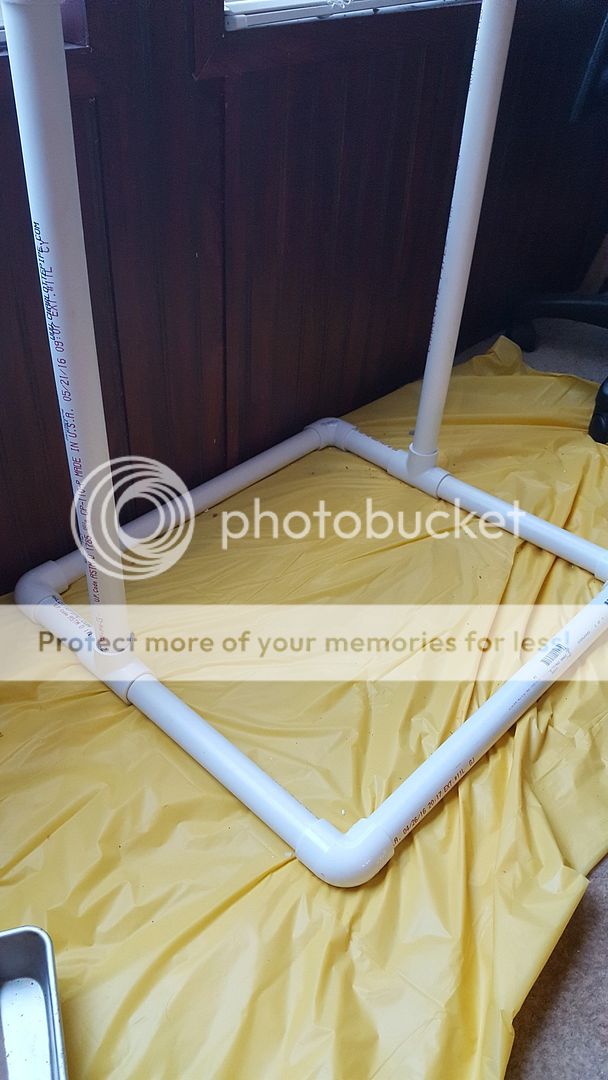
I will take a picture later, but I basically made a rectangle and had the post running up from the middle of the rectangle. However I put more of the rectangle towards the front of the stand since it weighs more in front of the main supports, and the back is close to the wall, were it to tip that way.
 
  • Thread Starter
  • Thread starter
  • #6
Awesome!
How did you put the sisal? It does not appear to have any knots?!
I drilled a hole in each end and tied the knots inside the pipe. She is a destruct- o-bird, so I didn't want to give her knots she could see. She would see that as an invitation to destroy them.

Sent from my SM-G920P using Tapatalk
 
Great DIY project!

FYI: If you place sandpaper of a tube and work at the inside center ridge and a little bit on the inside dia. of a 'Tee' it will slide over a stand pipe section. Make two and you have a swing top without needing cord. I came across this years ago with a swing away parrot perch.

Once again, well done and may the Chicken enjoy!
 
  • Thread Starter
  • Thread starter
  • #8
Great DIY project!

FYI: If you place sandpaper of a tube and work at the inside center ridge and a little bit on the inside dia. of a 'Tee' it will slide over a stand pipe section. Make two and you have a swing top without needing cord. I came across this years ago with a swing away parrot perch.

Once again, well done and may the Chicken enjoy!
Now that's smart. Maybe I'll do that if the chicken starts trying to chew through the rope.

Sent from my SM-G920P using Tapatalk
 
Wow thats a Fabulous job... It looks like its giing to be lots of fun for the pretty chicken :) :)
 
Inspiring! What was your process for cleaning the pvc before using it?
 
  • Thread Starter
  • Thread starter
  • #12
Inspiring! What was your process for cleaning the pvc before using it?

After it was all cut, I scrubbed it with soapy water, then I scrubbed it again with vinegar. I would have preferred to have been able to use bleach, but it makes me really nervous with my birds, so I just stick to dish soap then vinegar.
Inspiring! What was your process for cleaning the pvc before using it?


Sent from my SM-G920P using Tapatalk
 
  • Thread Starter
  • Thread starter
  • #13
I took some more pictures today for anyone who is interested in more details.

Here is the base of the stand. The front has longer poles because more of the structure is in front of the two main supports.


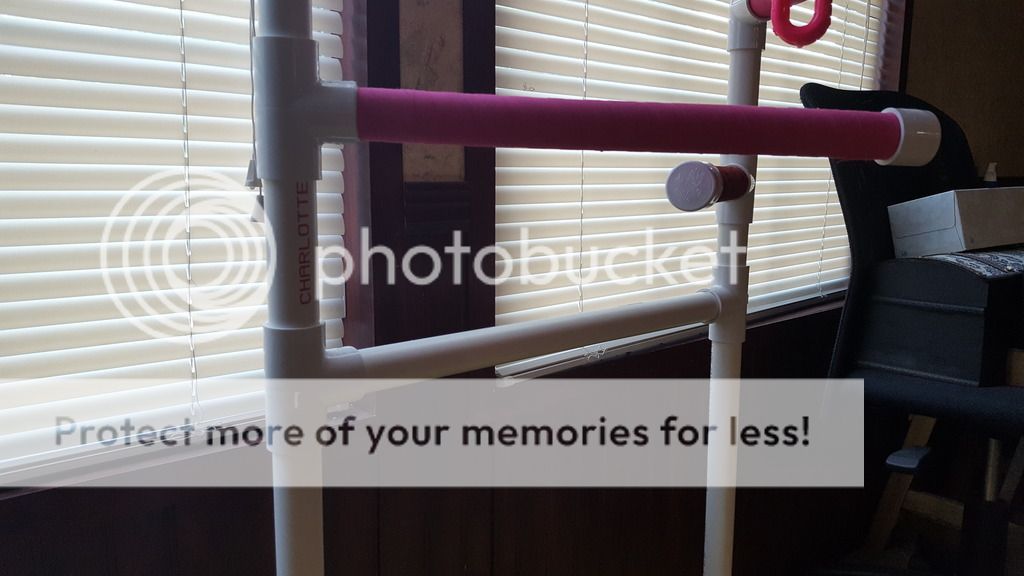
About halfway up, I have a support pole between the two main sides. I didn't really intend this as a perch, which is why it's not wrapped. I just didn't want the top to wiggle back and forth too much.


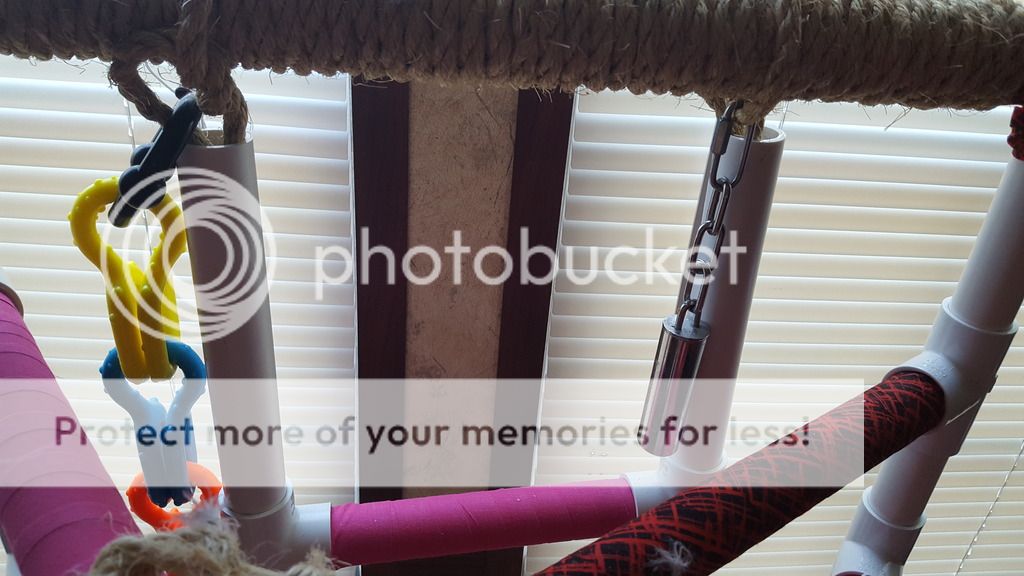
The swing is just a U made with three pieces of PVC and two elbow with a piece of sisal run all the way through it and tied to the perch above.


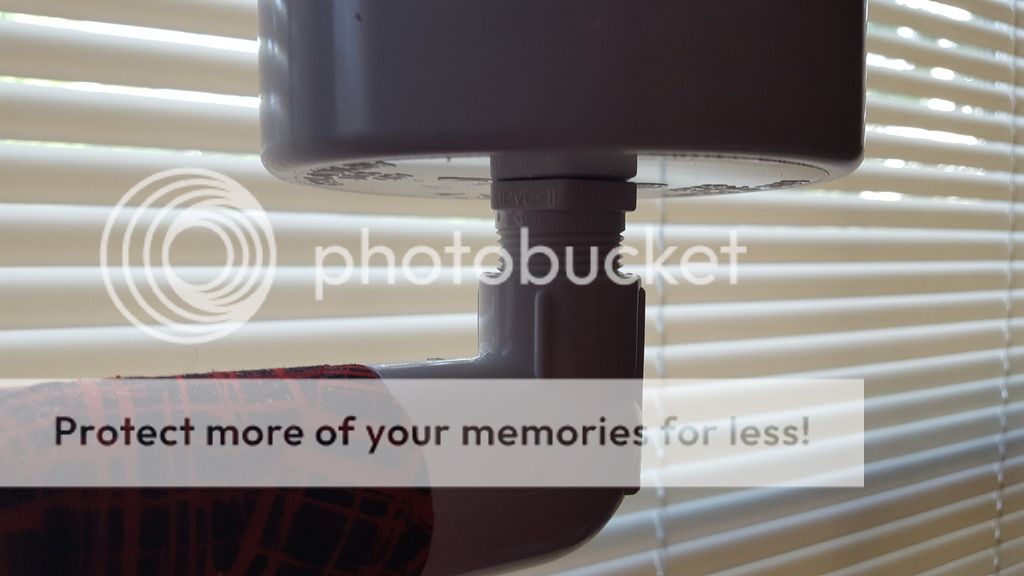
The bowls are 4" sewer caps glued on to threaded end caps. I used locktite, but made sure none of the glue seeped out the sides where she could get to it. Then I used elbows that were slip on one end and threaded on the other so that the bowls could be screwed on. This made them more secure so she can't just pull them up.


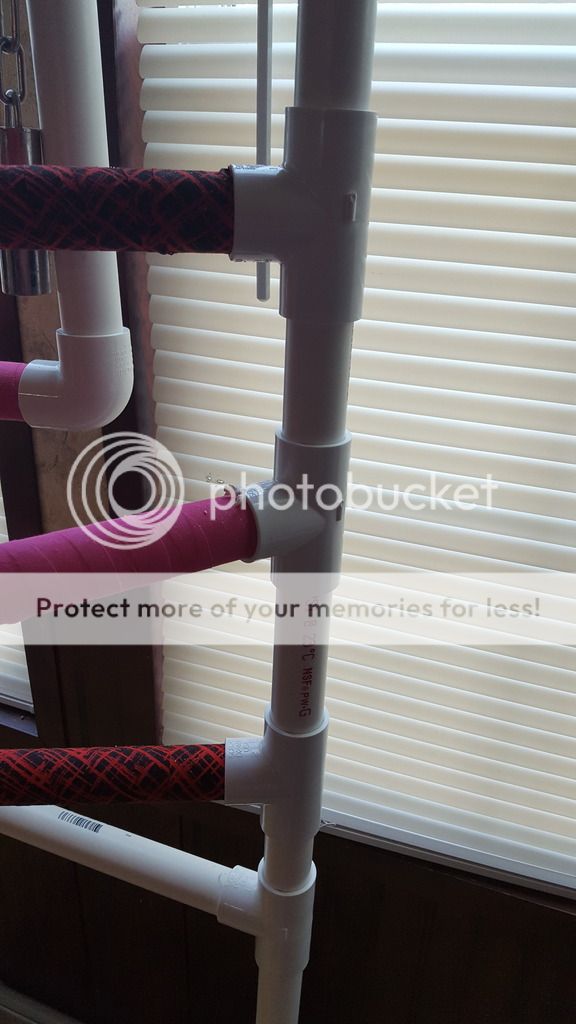
All of the extra perches are just attached with T's. However, between each T, are separately cut poles. They are different lengths, but you have to make sure that both sides have the same total length, or the very top will be lopsided and may not go together.


All of the extra perches are moveable, you just have to slide the T's to change how far out they are swung, and they are different sizes. The ends are covered in caps so that she can't chew inside the pipes.


I hope this helps if anyone is interested in making their own.
 
  • Thread Starter
  • Thread starter
  • #16
I ended up taking most of it apart, all she will perch on its the top bar, so I eventually took the rest of it off. Saves me room, and she's still happy. She isn't much of one to play outside of her cage, unless it's crawling into my lap to try to tear my laptop apart.

Sent from my SM-G920P using Tapatalk
 

Most Reactions

Latest posts

Back
Top