ForteBebe
New member
Decided it was finally time to start making my own birdie things, mostly for their safety since I know what materials I'm using, but also to save a heap of money! If you think something is outright unsafe for my fids (materials etc) don't hesitate to comment!
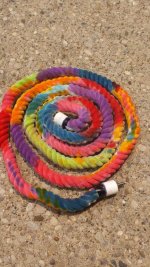
To kick this off, I want to show my first ever boing! It's 10 feet long, made with 3/4 inch white cotton rope, two 10-gauge aluminium wires twisted together, some pvc caps, electrical tape, hot glue, and stainless steel washers/screw/wing nut. The idea for dying was all getwozzy! You were a big help, thank you! For each color, I mixed 12 teaspoons of 90% alcohol and 1 teaspoon of food coloring. After that I applied the color with a spray bottle.
At the beginning, I took the wire and meticulously wrapped the cotton rope around it. This took a while since I wanted it perfect. Then just some simple hot glue to put the pvc caps on and boom! Done except for color
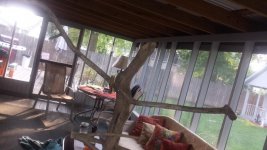
I really want to talk about my big project here which is the tree gym! I got some driftwood from the beach and had this idea. No need to buy an expensive stand when I can make one for a LOT less. Before starting this project I thoroughly scrubbed each piece with hot soapy water then gave them a nice long white vinegar-water solution bath to disinfect. Once I'm finished with the gym I will whip it down with vinegar again.
While I was at a garage sale I spotted a small 1-foot tall table. I actually paid $10 for it, since the wood was in great shape, the paint was just crappy.
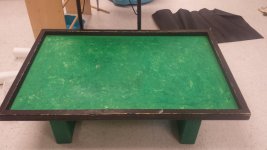
When I got home I found some nice orange-copper paint to refresh this piece
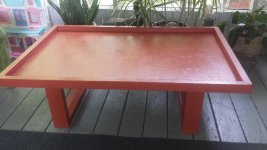
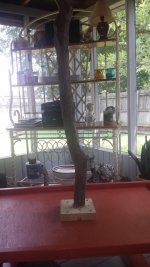
Now onto the project... I had a nice piece of driftwood that I wanted as my "trunk". I sawed off the bottom so it would sit flush with the table. I found some 2-inch thick piece of wood lying around, cut that about 7in by 8in, then started to tear away at the center. Once the trunk was able to fit in there, I took the piece of wood I had cut into and bolted it to the table, while also going through an extra slab on the bottom side (all stainless steel bolts/nuts/washers). Put the trunk in the center of the hole, preceded to screw diagonally from the slab to the trunk for stability. Also screw in from the underside of the table into the bottom of the trunk. After that I filled in the extra space of the hole with wood putty and painted over the slab.
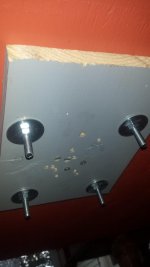
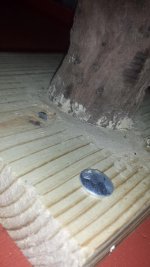
To be continued...!
To kick this off, I want to show my first ever boing! It's 10 feet long, made with 3/4 inch white cotton rope, two 10-gauge aluminium wires twisted together, some pvc caps, electrical tape, hot glue, and stainless steel washers/screw/wing nut. The idea for dying was all getwozzy! You were a big help, thank you! For each color, I mixed 12 teaspoons of 90% alcohol and 1 teaspoon of food coloring. After that I applied the color with a spray bottle.
At the beginning, I took the wire and meticulously wrapped the cotton rope around it. This took a while since I wanted it perfect. Then just some simple hot glue to put the pvc caps on and boom! Done except for color

I really want to talk about my big project here which is the tree gym! I got some driftwood from the beach and had this idea. No need to buy an expensive stand when I can make one for a LOT less. Before starting this project I thoroughly scrubbed each piece with hot soapy water then gave them a nice long white vinegar-water solution bath to disinfect. Once I'm finished with the gym I will whip it down with vinegar again.
While I was at a garage sale I spotted a small 1-foot tall table. I actually paid $10 for it, since the wood was in great shape, the paint was just crappy.

When I got home I found some nice orange-copper paint to refresh this piece

Now onto the project... I had a nice piece of driftwood that I wanted as my "trunk". I sawed off the bottom so it would sit flush with the table. I found some 2-inch thick piece of wood lying around, cut that about 7in by 8in, then started to tear away at the center. Once the trunk was able to fit in there, I took the piece of wood I had cut into and bolted it to the table, while also going through an extra slab on the bottom side (all stainless steel bolts/nuts/washers). Put the trunk in the center of the hole, preceded to screw diagonally from the slab to the trunk for stability. Also screw in from the underside of the table into the bottom of the trunk. After that I filled in the extra space of the hole with wood putty and painted over the slab.


To be continued...!

Last edited:
